Ads Approved How to Use
Go to Ads Approved Plugin
- Enable On page ( this will be your ad link) and safe page (for unwanted traffic) and save changes.

- Then click on Actions – edit


Offer Page – page for non-filtered users, your target users. Enter the full path to the page with http(s).
A/B Test – Offer Page testing mode. If you have several landing pages and you want to test which one better envelope. Show Content is the safest way to display a page without redirects. We recommend using this method if the page does not display correctly – then choose the Redirect method Redirect is a regular redirection, used if it is not possible to upload a page using the Show Content method, for example: you use a dynamic affiliate link, tracker, Instagram or telegram.

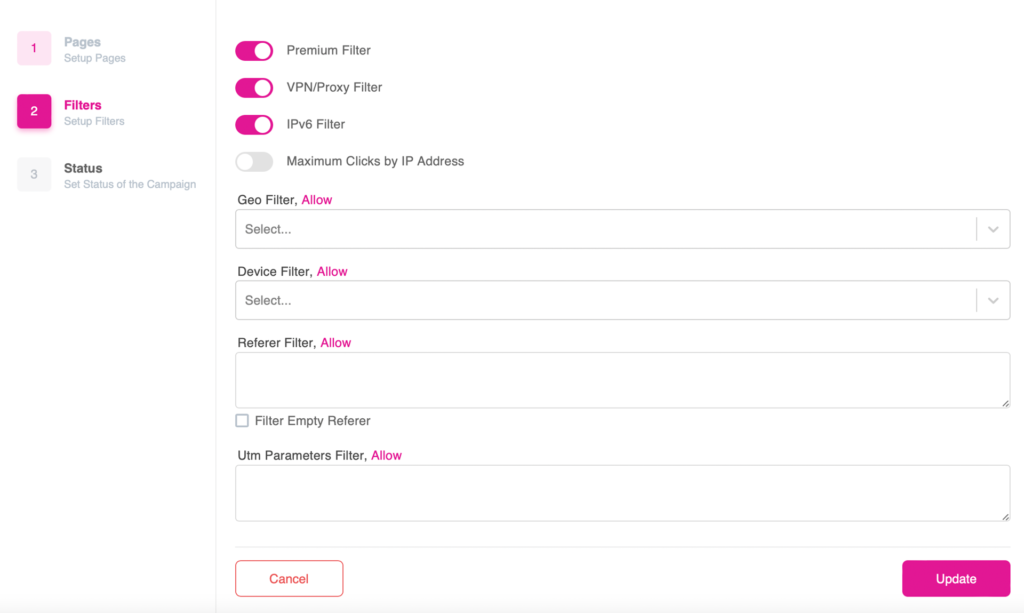
Premium – The main filter is, the author’s development of our service, which filters bots and moderators.
VPN/Proxy – Filters ip addresses VPN and Proxy providers.
IPv6 – Filters ip format IPv6
Maximum Clicks by IP Address – This is the maximum allowed number of transitions from one IP address. Visitors from IP addresses that exceed this limit will be filtered. 💡 Geo, Device, Referer, Utm Parameters filters can work in 2 modes: Allow and Disallow
For example
You have Geo filter is enabled in Allow mode and the country Netherlands is selected. The result – traffic from all countries except the Netherlands will be filtered on the White Page. If Disallow is enabled and the Netherlands is selected. Only the Netherlands will be filtered on the White Page.
Campaign status

Active – filters work in standard mode.
Pause – always shows White page regardless of filters.
Delay – delayed start, select the number of clicks Filter After, the campaign will be on pause after X clicks, after which it will switch to Active.
